NanoKVM is a hardware KVM switch developed by the Chinese company Sipeed. Released last year, it enables remote control of a computer or server using a virtual keyboard, mouse, and monitor. Thanks to its compact size and low price, it quickly gained attention online, especially when the company promised to release its code as open-source. However, as we’ll see, the device has some serious security issues. But first, let’s start with the basics.
How Does the Device Work?
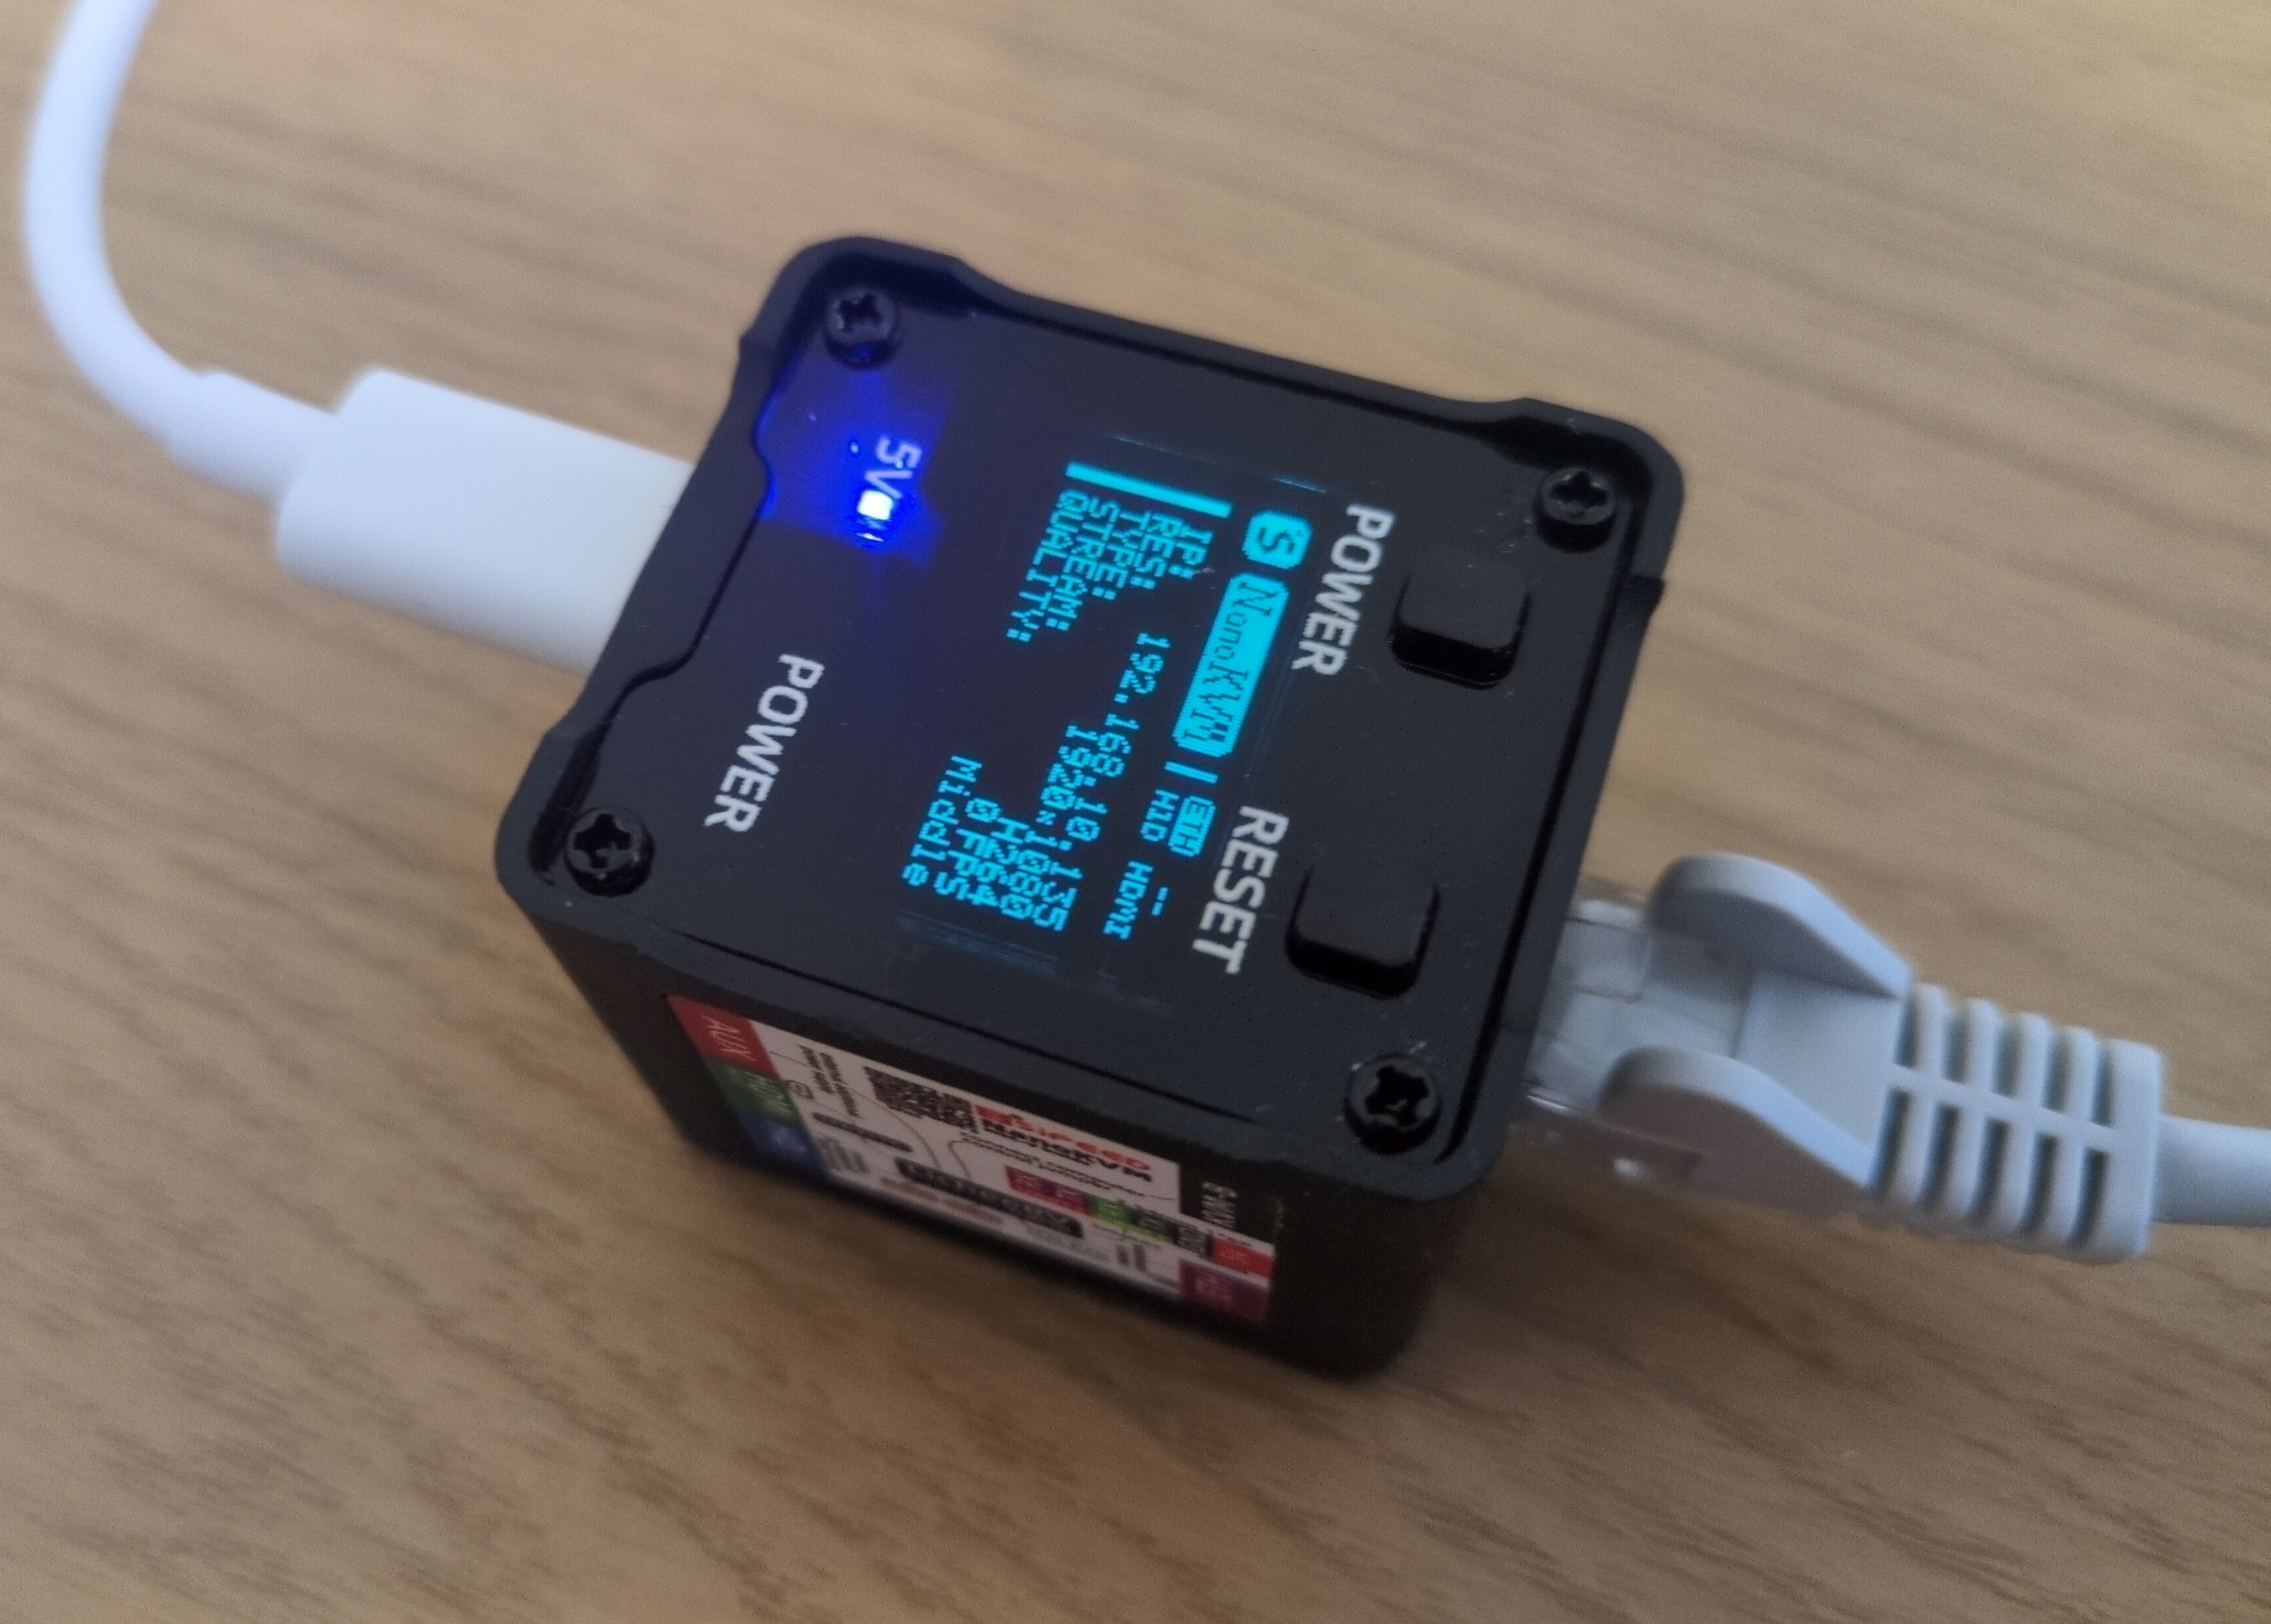
As mentioned, NanoKVM is a KVM switch designed for remotely controlling and managing computers or servers. It features an HDMI port, three USB-C ports, an Ethernet port for network connectivity, and a special serial interface. The package also includes a small accessory for managing the power of an external computer.
Using it is quite simple. First, you connect the device to the internet via an Ethernet cable. Once online, you can access it through a standard web browser (though JavaScript JIT must be enabled). The device supports Tailscale VPN, but with some effort (read: hacking), it can also be configured to work with your own VPN, such as WireGuard or OpenVPN server. Once set up, you can control it from anywhere in the world via your browser.
NanoKVM
The device could be connected to the target computer using an HDMI cable, capturing the video output that would normally be displayed on a monitor. This allows you to view the computer’s screen directly in your browser, essentially acting as a virtual monitor.
Through the USB connection, NanoKVM can also emulate a keyboard, mouse, CD-ROM, USB drive, and even a USB network adapter. This means you can remotely control the computer as if you were physically sitting in front of it - but all through a web interface.
While it functions similarly to remote management tools like RDP or VNC, it has one key difference: there’s no need to install any software on the target computer. Simply plug in the device, and you’re ready to manage it remotely. NanoKVM even allows you to enter the BIOS, and with the additional accessory for power management, you can remotely turn the computer on, off, or reset it.
This makes it incredibly useful - you can power on a machine, access the BIOS, change settings, mount a virtual bootable CD, and install an operating system from scratch, just as if you were physically there. Even if the computer is on the other side of the world.
NanoKVM is also quite affordable. The fully-featured version, which includes all ports, a built-in mini screen, and a case, costs just over €60, while the stripped-down version is around €30. By comparison, a similar RaspberryPi-based device, PiKVM, costs around €400. However, PiKVM is significantly more powerful and reliable and, with a KVM splitter, can manage multiple devices simultaneously.
As mentioned earlier, the announcement of the device caused quite a stir online - not just because of its low price, but also due to its compact size and minimal power consumption. In fact, it can be powered directly from the target computer via a USB cable, which it also uses to simulate a keyboard, mouse, and other USB devices. So you have only one USB cable - in one direction it powers NanoKVM, on the other it helps it to simulate keyboard mouse and other devices on a computer you want to manage.
The device is built on the open-source RISC-V processor architecture, and the manufacturer eventually did release the device’s software under an open-source license at the end of last year. (To be fair, one part of the code remains closed, but the community has already found a suitable open-source replacement, and the manufacturer has promised to open this portion soon.)
However, the real issue is security.
Understandably, the company was eager to release the device as soon as possible. In fact, an early version had a minor hardware design flaw - due to an incorrect circuit cable, the device sometimes failed to detect incoming HDMI signals. As a result, the company recalled and replaced all affected units free of charge. Software development also progressed rapidly, but in such cases, the primary focus is typically on getting basic functionality working, with security taking a backseat.
So, it’s not surprising that the developers made some serious missteps - rushed development often leads to stupid mistakes. But some of the security flaws I discovered in my quick (and by no means exhaustive) review are genuinely concerning.
One of the first security analysis revealed numerous vulnerabilities - and some rather bizarre discoveries. For instance, a security researcher even found an image of a cat embedded in the firmware. While the Sipeed developers acknowledged these issues and relatively quickly fixed at least some of them, many remain unresolved.
NanoKVM
After purchasing the device myself, I ran a quick security audit and found several alarming flaws. The device initially came with a default password, and SSH access was enabled using this preset password. I reported this to the manufacturer, and to their credit, they fixed it relatively quickly. However, many other issues persist.
The user interface is riddled with security flaws - there’s no CSRF protection, no way to invalidate sessions, and more. Worse yet, the encryption key used for password protection (when logging in via a browser) is hardcoded and identical across all devices. This is a major security oversight, as it allows an attacker to easily decrypt passwords. More problematic, this needed to be explained to the developers. Multiple times.
Another concern is the device’s reliance on Chinese DNS servers. And configuring your own (custom) DNS settings is quite complicated. Additionally, the device communicates with Sipeed’s servers in China - downloading not only updates but also the closed-source component mentioned earlier. For this closed source component it needs to verify an identification key, which is stored on the device in plain text. Alarmingly, the device does not verify the integrity of software updates, includes a strange version of the WireGuard VPN application (which does not work on some networks), and runs a heavily stripped-down version of Linux that lacks systemd and apt. And these are just a few of the issues.
Were these problems simply oversights? Possibly. But what additionally raised red flags was the presence of tcpdump and aircrack - tools commonly used for network packet analysis and wireless security testing. While these are useful for debugging and development, they are also hacking tools that can be dangerously exploited. I can understand why developers might use them during testing, but they have absolutely no place on a production version of the device.
A Hidden Microphone
And then I discovered something even more alarming - a tiny built-in microphone that isn’t clearly mentioned in the official documentation. It’s a miniature SMD component, measuring just 2 x 1 mm, yet capable of recording surprisingly high-quality audio.
What’s even more concerning is that all the necessary recording tools are already installed on the device! By simply connecting via SSH (remember, the device initially used default passwords!), I was able to start recording audio using the amixer and arecord tools. Once recorded, the audio file could be easily copied to another computer. With a little extra effort, it would even be possible to stream the audio over a network, allowing an attacker to eavesdrop in real time.
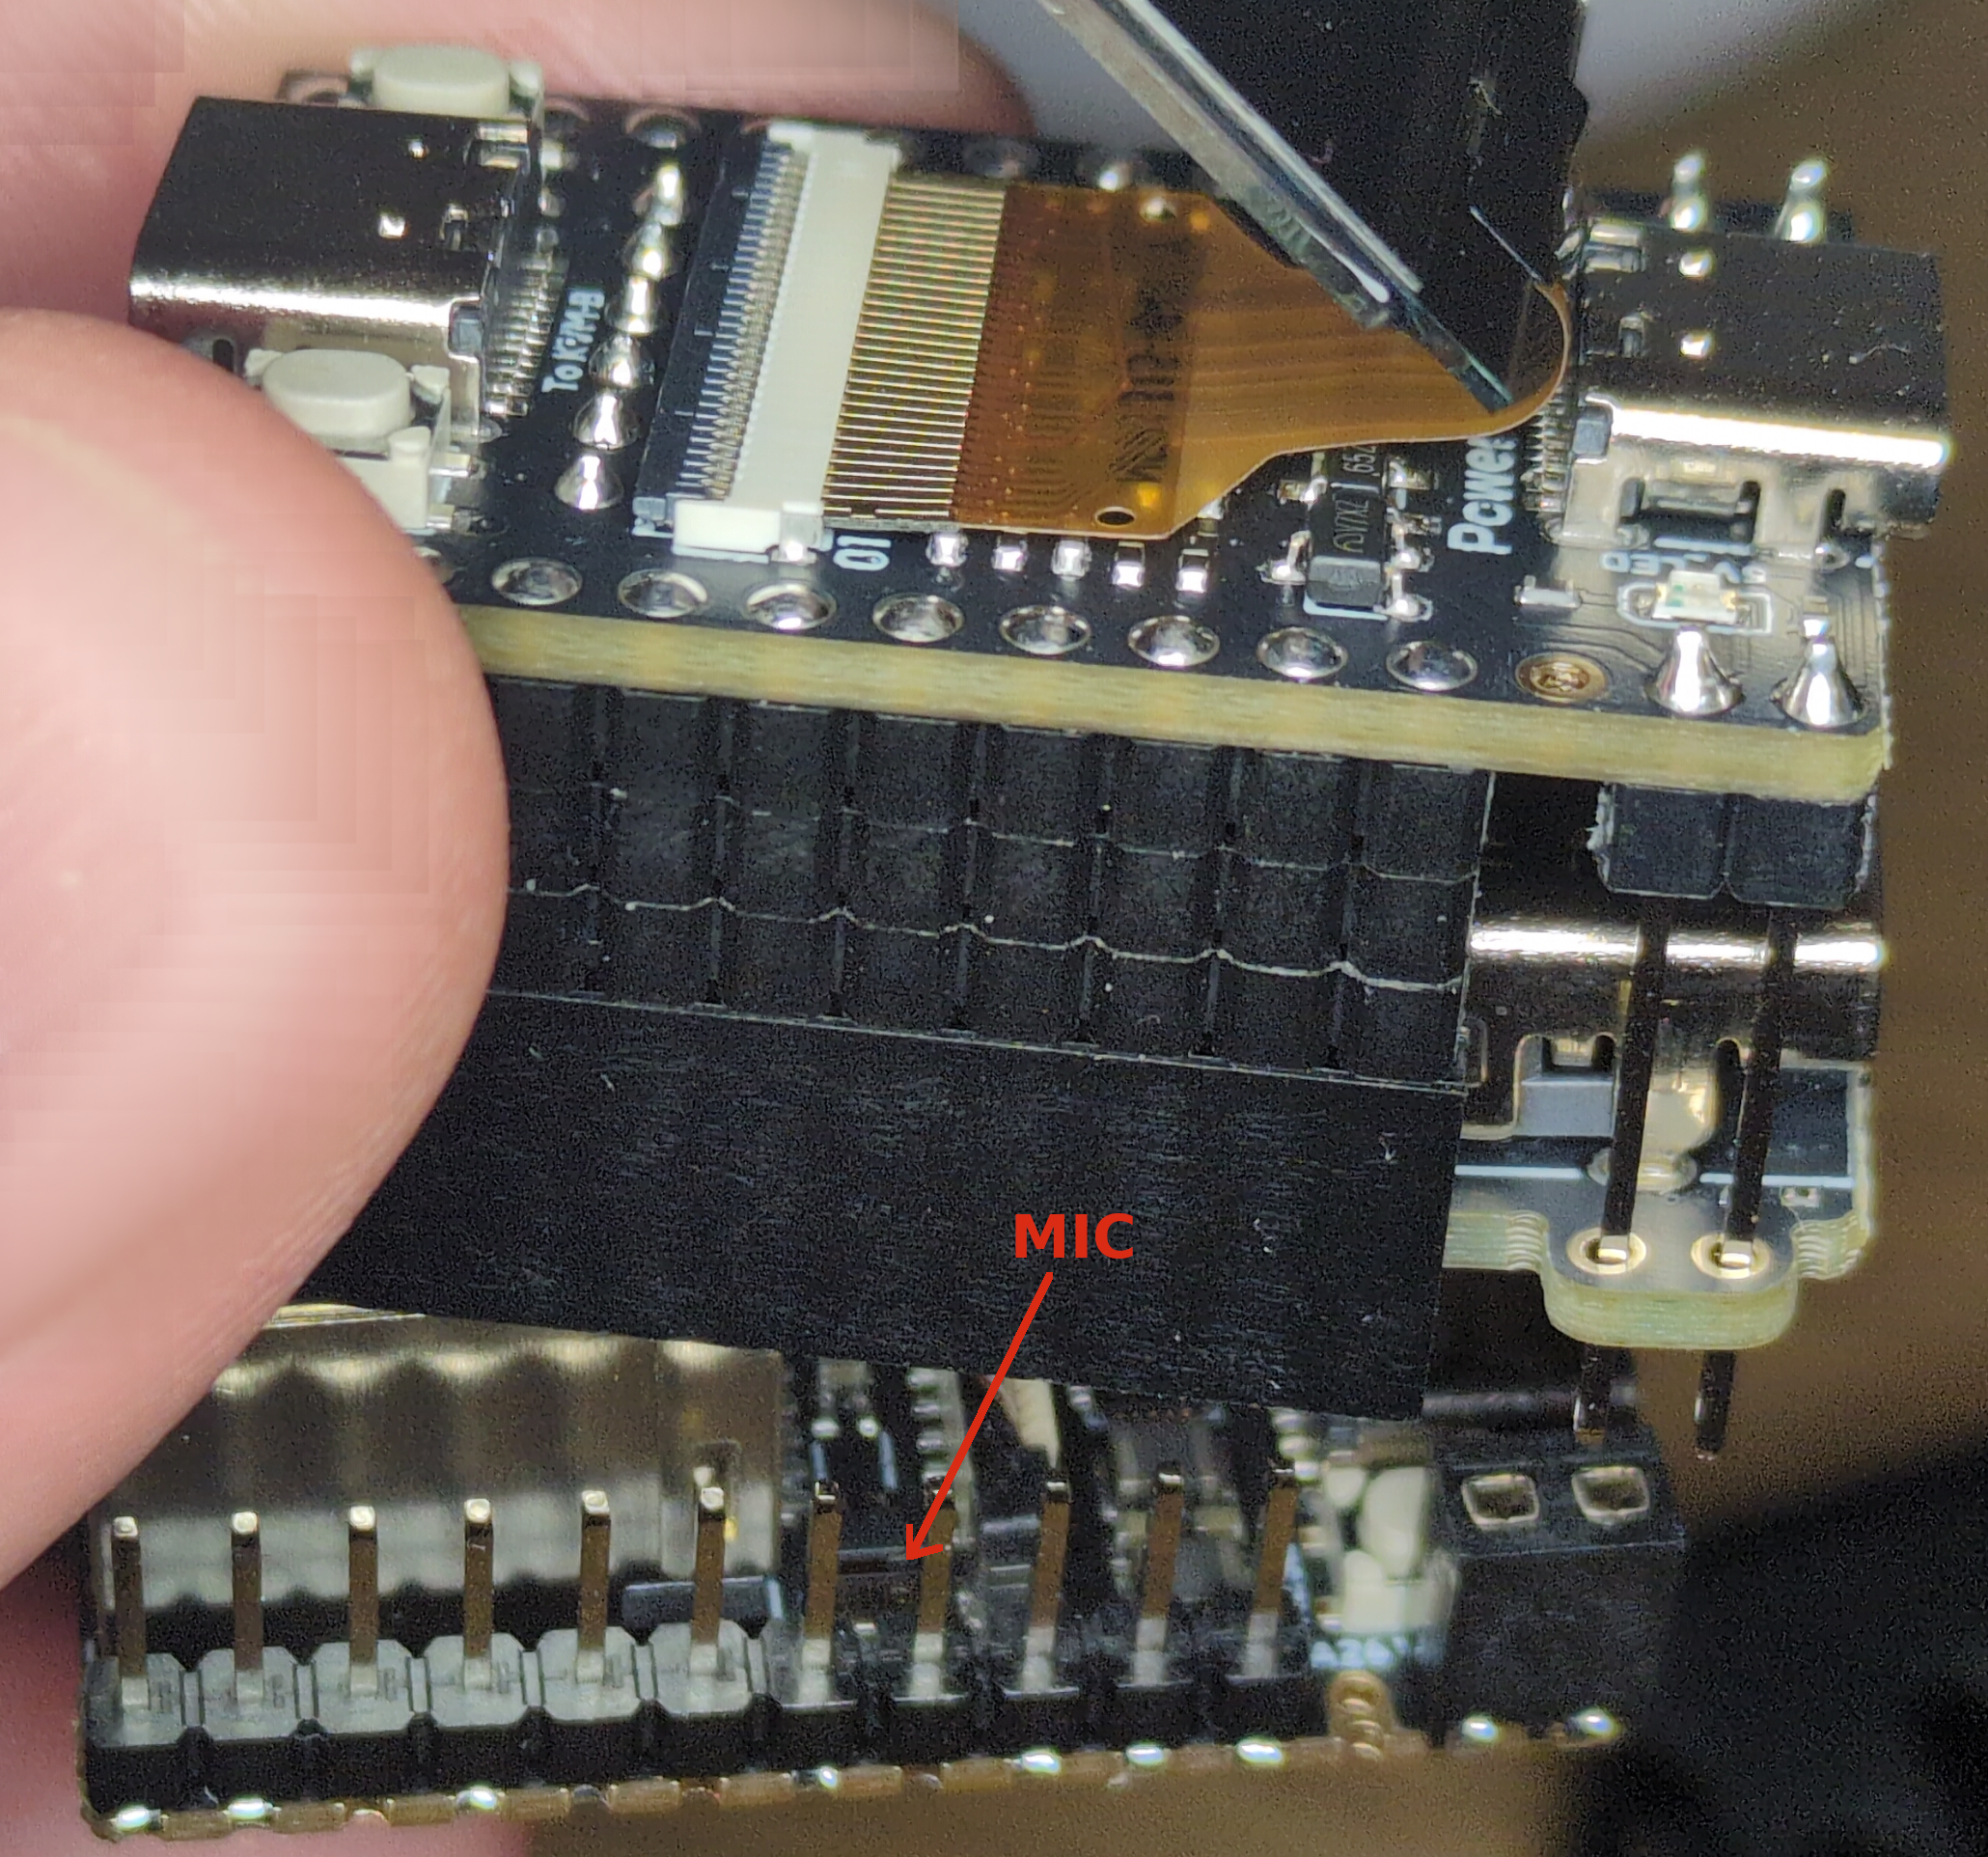
Hidden Microphone in NanoKVM
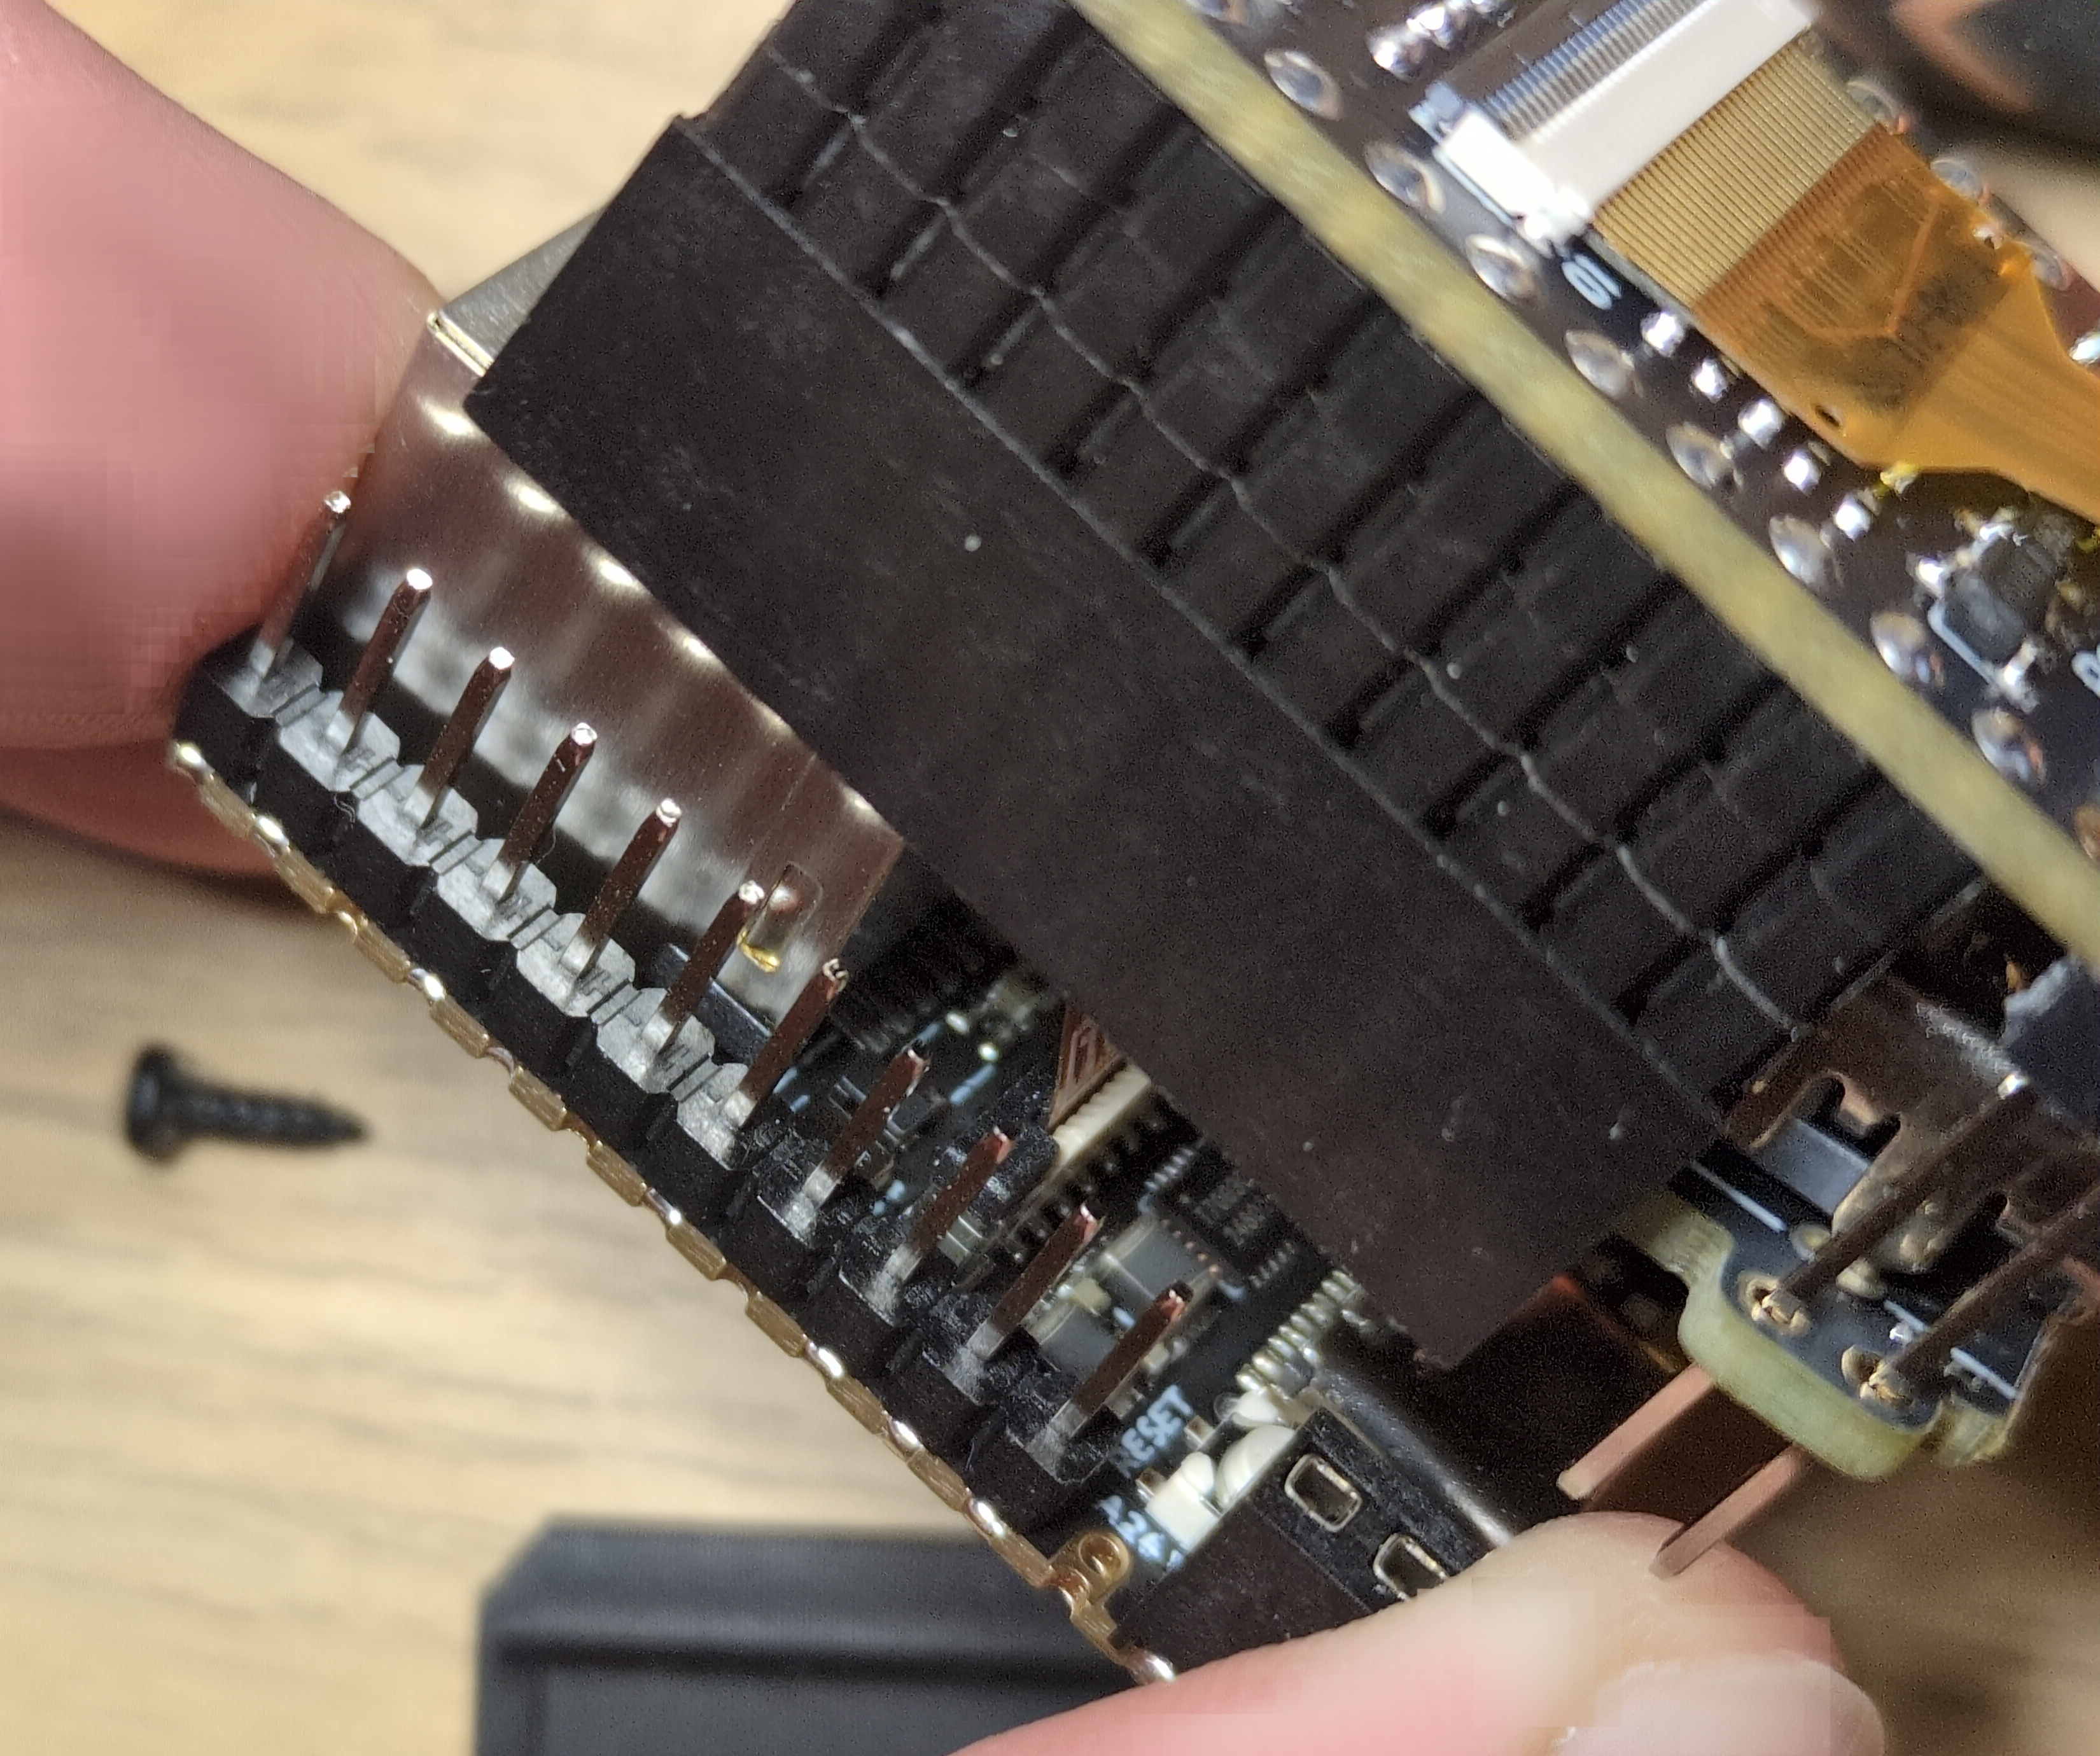
Physically removing the microphone is possible, but it’s not exactly straightforward. As seen in the image, disassembling the device is tricky, and due to the microphone’s tiny size, you’d need a microscope or magnifying glass to properly desolder it.
To summarize: the device is riddled with security flaws, originally shipped with default passwords, communicates with servers in China, comes preinstalled with hacking tools, and even includes a built-in microphone - fully equipped for recording audio - without clear mention of it in the documentation. Could it get any worse?
I am pretty sure these issues stem from extreme negligence and rushed development rather than malicious intent. However, that doesn’t make them any less concerning.
That said, these findings don’t mean the device is entirely unusable.
Since the device is open-source, it’s entirely possible to install custom software on it. In fact, one user has already begun porting his own Linux distribution - starting with Debian and later switching to Ubuntu. With a bit of luck, this work could soon lead to official Ubuntu Linux support for the device.
This custom Linux version already runs the manufacturer’s modified KVM code, and within a few months, we’ll likely have a fully independent and significantly more secure software alternative. The only minor inconvenience is that installing it requires physically opening the device, removing the built-in SD card, and flashing the new software onto it. However, in reality, this process isn’t too complicated.
And while you’re at it, you might also want to remove the microphone… or, if you prefer, connect a speaker. In my test, I used an 8-ohm, 0.5W speaker, which produced surprisingly good sound - essentially turning the NanoKVM into a tiny music player. Actually, the idea is not so bad, because PiKVM also included 2-way audio support for their devices end of last year.
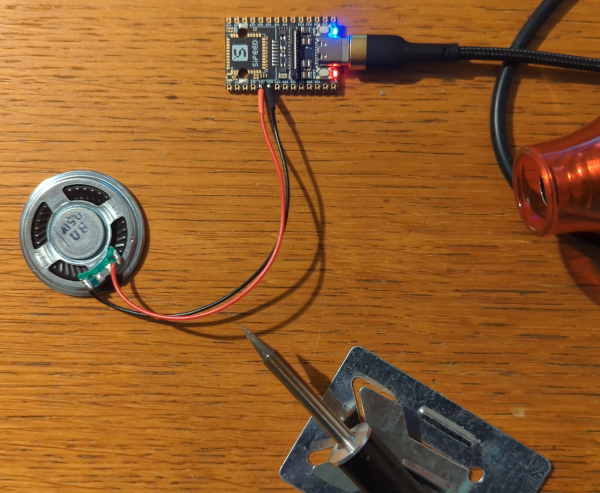
Basic board with speaker
Final Thoughts
All this of course raises an interesting question: How many similar devices with hidden functionalities might be lurking in your home, just waiting to be discovered? And not just those of Chinese origin. Are you absolutely sure none of them have built-in miniature microphones or cameras?
You can start with your iPhone - last year Apple has agreed to pay $95 million to settle a lawsuit alleging that its voice assistant Siri recorded private conversations. They shared the data with third parties and used them for targeted ads. “Unintentionally”, of course! Yes, that Apple, that cares about your privacy so much.
And Google is doing the same. They are facing a similar lawsuit over their voice assistant, but the litigation likely won’t be settled until this fall. So no, small Chinese startup companies are not the only problem. And if you are worried about Chinese companies obligations towards Chinese government, let’s not forget that U.S. companies also have obligations to cooperate with U.S. government. While Apple is publicly claiming they do not cooperate with FBI and other U. S. agencies (because thy care about your privacy so much), some media revealed that Apple was holding a series secretive Global Police Summit at its Cupertino headquarters where they taught police how to use their products for surveillance and policing work. And as one of the police officers pointed out - he has “never been part of an engagement that was so collaborative.”. Yep.
P.S. How to Record Audio on NanoKVM
If you want to test the built-in microphone yourself, simply connect to the device via SSH and run the following two commands:
amixer -Dhw:0 cset name='ADC Capture Volume 20' (this sets microphone sensitivity to high)arecord -Dhw:0,0 -d 3 -r 48000 -f S16_LE -t wav test.wav & > /dev/null & (this will capture the sound to a file named test.wav)
Now, speak or sing (perhaps the Chinese national anthem?) near the device, then press Ctrl + C, copy the test.wav file to your computer, and listen to the recording.